Whenever you start something new, there is always the stress to get caught up or to be on the same level as the people who started before you. This is especially stressful when the need to get caught up is directly linked to your job security and paycheck. More often than not, you will be thrown into a job that requires you to have a basic understanding of a presenting tool, such as Microsoft PowerPoint. Here, I will show you how to use PowerPoint in 10 points (not steps) that will ease your learning curve.
1. Insert and Change a Theme
Themes are simply a background linked with a font and a color scheme that applies into text, shapes, and even tables. You will be prompted when opening PowerPoint to select a theme before starting production. In case you want to select a different theme, go to the Design tab, and select a theme that fits your needs. The selected theme will be located to the very left of the theme ribbon. You can also select a variant of that same theme (which basically just changes the color of the theme). To view a blog that delves deeper into Themes and SmartArt, Click Here .
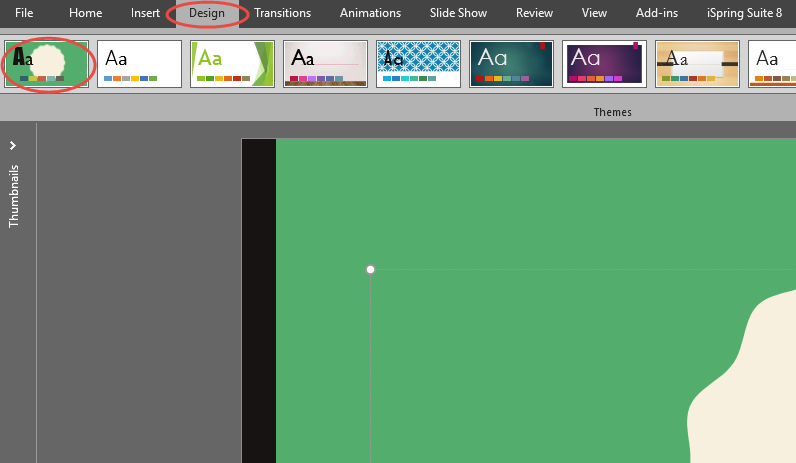
Click to Enlarge
2. New Slide
Slides are where your content will reside. You can determine how you want to categorize it by adding slides. To add a new slide you can either navigate to the Insert tab and click on New Slide button (located to the very left of the ribbon), or you can right click under the slide thumbnails section (located to the left of the main canvas) and select New Slide.
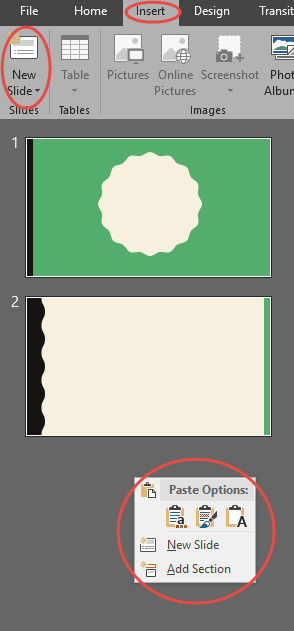
Click to Enlarge
3. Change the Layout of a Slide
Slide layouts are built-in, formatted slides. For example, you can have a Title Slide with a big text box and font size. Other layouts are built more for body slides (like how you would have a body paragraph in an essay) or slides with photo placeholders; these allow you to insert a photo and text without having to reformat. To change the layout of a slide, select the slide you wish to change and select Layout on the Home tab. Then choose which layout you would like to switch the slide to be.
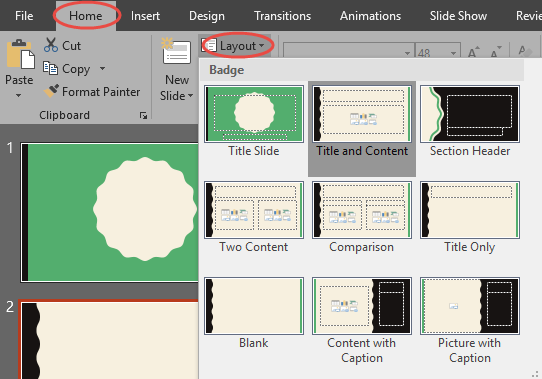
Click to Enlarge
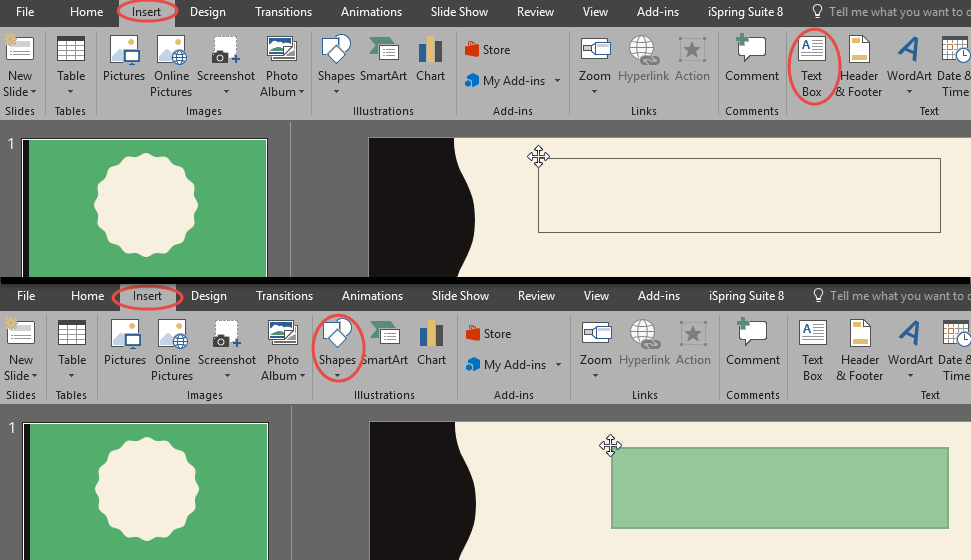
4. Insert Text/Shapes
To insert text into a slide that already has a text box ready for you to use is as easy as clicking and typing. But if you wanted to start from scratch, by adding your own text box, you simply go to the Insert tab and click on Text Box (located to the middle-right of the ribbon). Then you click and drag the text box to the size and dimension that fit your specifications. The process is almost the exact same for inserting a shape into your project file. Go to the Insert tab and click on Shapes and select which shape you want to insert and then click and drag the shape to meet your needs.
Click to Enlarge
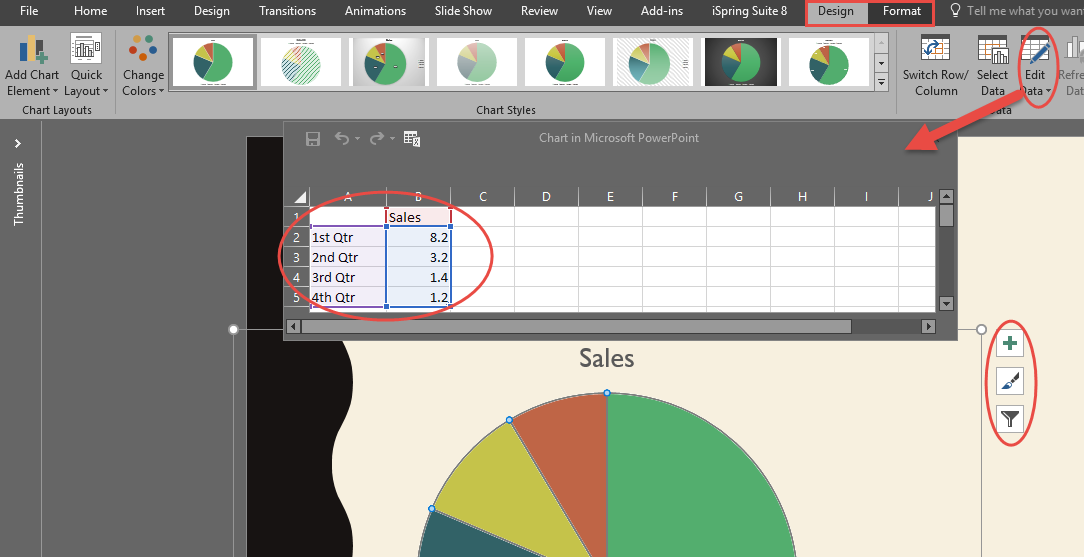
5. Insert and Modify a Chart
Charts in PowerPoint are very good descriptive objects that let you display numbers and statistics in an interesting and informative way. To insert a chart, you simply go to the Insert tab and click on Chart. You will be given a variety of charts to use in your project. Once you insert a chart of your choosing, click on the Edit Data button while selecting the graph. This will allow you to change the numbers that are displayed graphically. You can also change the color and style of the chart by using the Design tab of the Chart Tools; this will allow you to add shadows and other design aspects to you charts. You can add extra elements to the chart such as a legend, data tables and a chart title by clicking on the Add Chart Element located to the very left of the ribbon. (Note, to see the options available to edit on the chart you need to be selecting the chart and using the tabs located under the Chart Tools subsection.) Or you can click on the green plus symbol located to the right of the chart. To get a more in depth walk-through concerning charts, Click Here.
Click to Enlarge
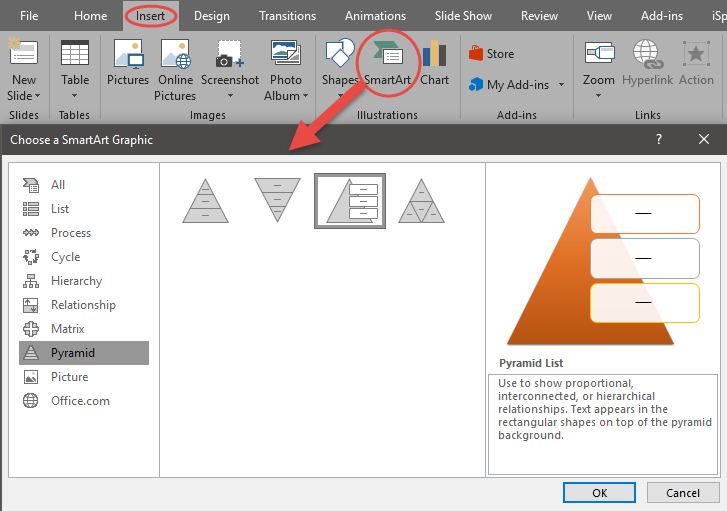
6. SmartArt
SmartArt is a function that turns plain text into a graphic that can be modified. It is a simple yet effective way to get your audience to pay more attention to your presentation. There are two ways to insert SmartArt into your project, the first way is by simply going to the Insert tab and click on SmartArt. From there you can insert the text you want into the given text boxes.
Click to Enlarge
The second way to get SmartArt into your projects is by transforming already given text (including bullet points) into SmartArt. You do this by right clicking on the text box you wish to transform and scroll down to Convert to SmartArt. You can then select from the SmartArt templates given to you or click on More SmartArt Graphics to view the whole library.

Click to Enlarge
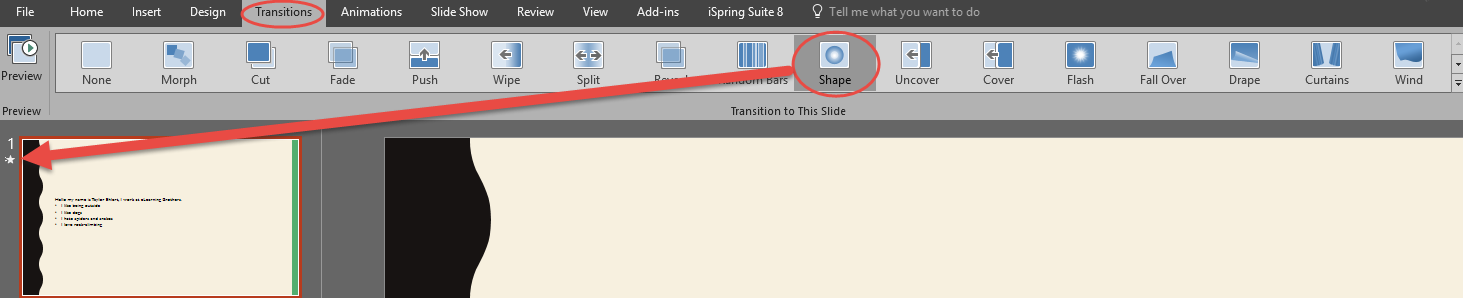
7. Simple Transitions
Transitions are simply animations that are applied to slides as a whole. They are used to when moving between slides. To apply a transition you need to navigate to the Transitions tab. There, you can apply any transition from the built-in transitions library. Be aware that there is a drop down arrow that will show you many more transitions that are available to you. Simply click on a transition to apply it to the selected slide. Once it is applied, you will see a star under the slide number.
Click to Enlarge
8. Easy Animations
Animations are very similar to transitions, the only difference is that animations apply specifically to the content that slides hold: text, shapes, graphs, SmartArt, pictures, etc. Animations are applied exactly like transitions; click on the object you want to add an animation to, and then click on the animation you wish to apply. There is also a drop down arrow that will reveal more animations available to you. I recently wrote a blog specifically talking about Transitions and Animations which offers a more comprehensive overview of those subjects. Click Here to view that blog.

Click to Enlarge
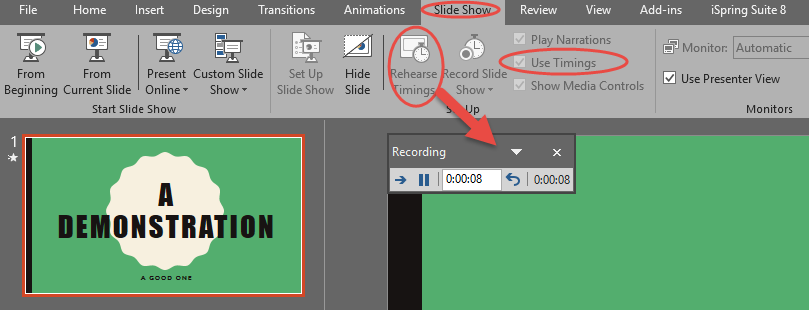
9. Rehearse Timings
Microsoft—with the knowledge that you will be using PowerPoint to present to groups of people—incorporated a way for you to time yourself in preparation for your presentations. The Rehearse Timings feature allows you to run through your project as if you were giving it to an actual audience, and it will keep track of how long it took you to go through each slide (and in total, your whole project). To start rehearsing your timings, go to the Slide Show tab and click on Rehearse Timings. This will automatically start your presentation with a timer in the upper lefthand corner. Now go through your presentation as if you were giving it to an audience, and at the end of the presentation you will be given the option to keep or discard the timings. In accepting the timings, your presentation will be bound to those times. Which means the time it took you to go through a slide in the rehearsal will now be set in stone. And after that time the slide will automatically advance. This can be disabled, if needed.
Click to Enlarge
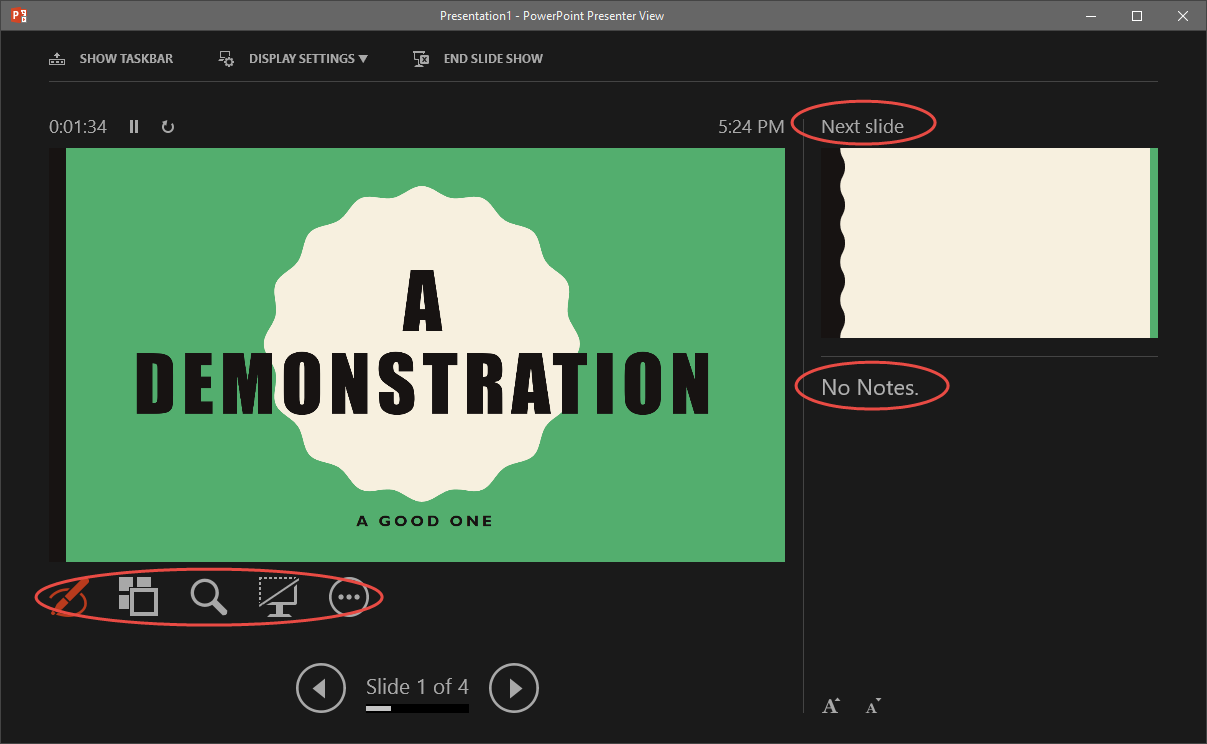
10. Presenter View
Presenter View is exactly what it sounds like: A view for presenters. This is one of the most helpful views in PowerPoint. The Presenter View gives the presenter a different view of the presentation than what is being shown to the audience. The first thing to notice is that you are given a smaller view of the current slide, as well as a preview of what slide is to come. This allows you to transition smoothly, both cognitively and verbally. You are also given tools like a laser pointer/pen to bring attention to certain areas in your project. You can also blank out the presentation completely with one click, which then permits you to command the full attention of your audience for a live discussion or presentation. To enable Presenter View (if it is not already enabled), go to the Slide Show tab and check the box next to Use Presenter View. The next time you preview your project, you will have the Presenter View pop up as well as what the audience will see.
Click to Enlarge
In following these 10 points you will quickly become comfortable using the tools and creating presentations in PowerPoint. Let me know in the comments section below if you agree with these 10 points.
Recent Comments